Raspberry Pi Zero - MPU-9255 IMU via i2c
Tutorial for accessing a MPU-9255 IMU (9-axis Accelerometer + Compass) via i2c from a Pi Zero.
MPU-9255
This is a tutorial for how to access data from the MPU-9255 IMU with 9-axis accelerometer and compass.
Parts List
- 9-Axis Accelorometer / Gyroscope / Compage (~$15) - Used for Robotic Telemetry Tutorial
- 4 Pin Connectors (~$9) - for clean connections between IMU and Pi Zero
- Soldering Iron (~19)
Step 1 - i2c Setup
Since many of our sensors and tutorials will make use of I2C, lets setup i2c and get it out of the way.
Start by enabling the i2c kernel module via sudo raspi-config. Once the menu loads, go to Advanded Options (7) and then A6 I2C and then 'Yes' to enable it.
Next, you'll want to install some handy i2c command line tools via sudo apt-get install i2c-tools
Now lets see if the i2c Kernel module is installed correctly by asking the Pi to probe the I2c bus for any available devices. Remeber, i2c allows multiple devices to communicate with the master (your pi) over the same 2 wires. The following command will tell us if any devices are present (there shouldn't be any since we haven't wired any yet).
sudo i2cdetect -y 1
     0  1  2  3  4  5  6  7  8  9  a  b  c  d  e  f
00:          -- -- -- -- -- -- -- -- -- -- -- -- --
10: -- -- -- -- -- -- -- -- -- -- -- -- -- -- -- --
20: -- -- -- -- -- -- -- -- -- -- -- -- -- -- -- --
30: -- -- -- -- -- -- -- -- -- -- -- -- -- -- -- --
40: -- -- -- -- -- -- -- -- -- -- -- -- -- -- -- --
50: -- -- -- -- -- -- -- -- -- -- -- -- -- -- -- --
60: -- -- -- -- -- -- -- -- -- -- -- -- -- -- -- --
70: -- -- -- -- -- -- -- --
Step 2 - MPU-9255, An i2c 9-Axis Accelerometer + Compass
In this step we will wire up our MPU-9255 9-Axis Accelerometer & Compass. Then we will re-run our i2c probe command and start querying our new i2c device.
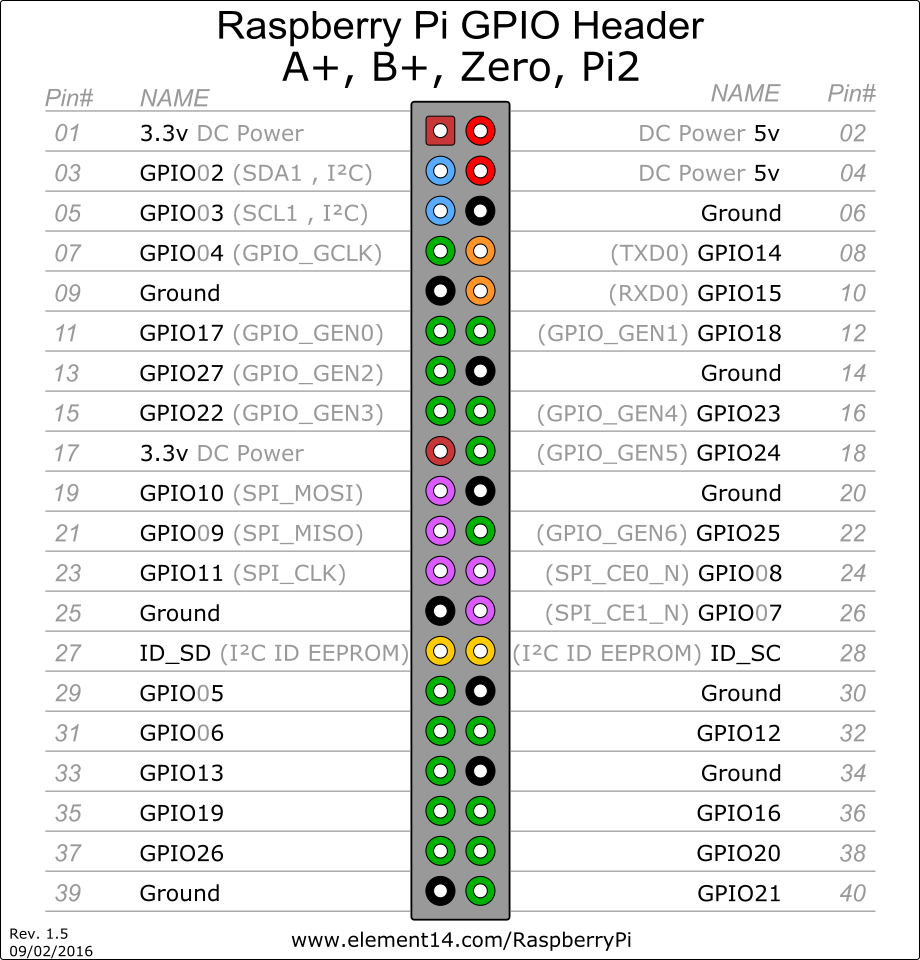
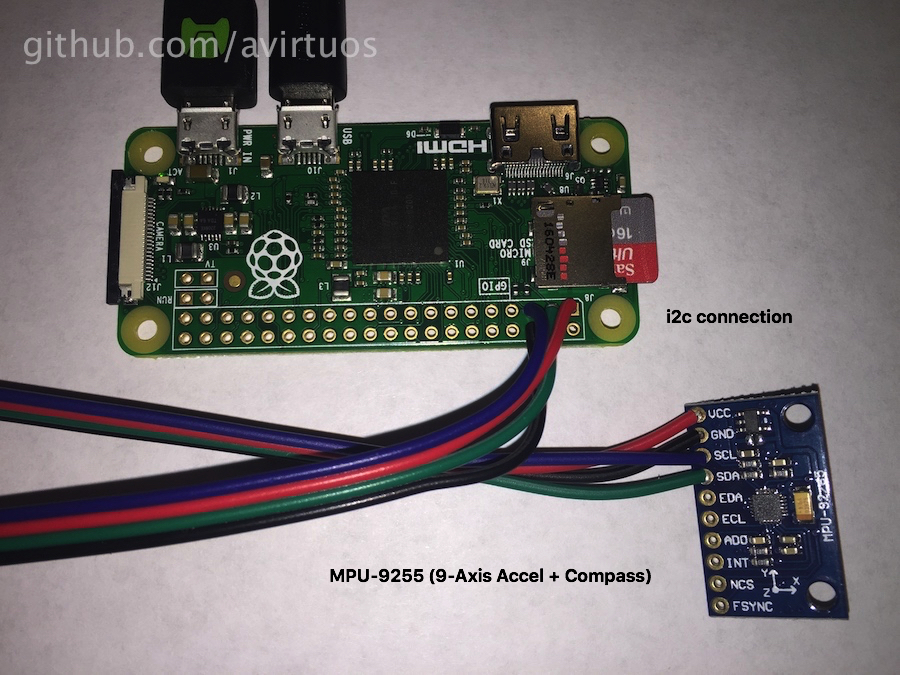
Here is an image of how to wire up both the pi and the accelerometer.

And here is our finished product.

And now our i2c prob clearly shows an available device at address 0x68.
pi@raspberrypi:~ $ sudo i2cdetect -y 1
     0  1  2  3  4  5  6  7  8  9  a  b  c  d  e  f
00:          -- -- -- -- -- -- -- -- -- -- -- -- --
10: -- -- -- -- -- -- -- -- -- -- -- -- -- -- -- --
20: -- -- -- -- -- -- -- -- -- -- -- -- -- -- -- --
30: -- -- -- -- -- -- -- -- -- -- -- -- -- -- -- --
40: -- -- -- -- -- -- -- -- -- -- -- -- -- -- -- --
50: -- -- -- -- -- -- -- -- -- -- -- -- -- -- -- --
60: -- -- -- -- -- -- -- -- 68 -- -- -- -- -- -- --
70: -- -- -- -- -- -- -- --
Now lets grab some of the software that will let us actually pull data from the MPU-9255. Thankfully there is already an open source library for this, which I've forked here.
But before we do that, we'll need to grab a few dev tools and pre-reqs.
sudo apt-get install cmake python-dev octave
Next lets clone our RTIMULib2 repo by executing
git clone https://github.com/avirtuos/RTIMULib2.git
Once the cloning is complete, lets build and install the library by running.
cd RTIMULib2/Linux/RTIMULibCal
make -j4
sudo make install
Now you should be able to run RTIMULibCal from the command line and follow the prompts to do some basic callibration on the sensor.
Options are:

  m - calibrate magnetometer with min/max
  e - calibrate magnetometer with ellipsoid (do min/max first)
  a - calibrate accelerometers
  x - exit
Step 3 - Accessing the IMU via Python
Have a look at IMU.py in the src directory. More to come here soon...